TOOLS USED
- a piece of toned Canson Mi Tientes paper smooth side
- erasers...all types and varieties (kneaded, red, white, pencil....try them all to find what works for you)
- charcoal pencils
- conte sticks (black, sanguine, white)
- a chamois (small piece of tanned leather)
- a small cotton cloth
- an erasing shield
- smudge stick
- tape, newsprint and a drawing board
- photo or draw from life....(I like using charcoal and conte to sketch from life)
Here are some of the things that I use for this type of drawing technique
The PROCESS......Stage 3: Above one can see the progression of the drawing. The conte is blended, charcoal is used in the dark value areas and then an eraser is used to pull out the lighter areas. Using an eraser is much like drawing.

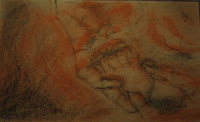
Nico's Toes...not the final version..
Stage 5: This was supposed to be the final drawing with my name signed to it. However, I really did not like it at all so I set it aside for a day. After looking at it for a day, I knew that I hated the end drawing so I ended up redoing it. I erased a lot of the dark areas out with both the red eraser and one of those soft, big ones. I then added more of a sanguine color and redrew some areas. My mistake with this one was probably using charcoal to do the initial drawing instead of a sanguine conte. By using the charcoal, the dark areas were just too overworked. The drawing at the beginning of the post is how I am going to leave it. (I may soften the highlights at the top, but for now I will leave it as is.)
This really wasn't one of my better attempts, but I thought that it would be helpful to see the process. Even if one goofs up, it still can be corrected. Next time I will use a lot less charcoal and start the drawing using the mid-tone sanguine conte and then use the charcoal and the white for the light and dark areas. It is very important to save the white for the very end. There have been times when I just could not resist putting it on the paper. What happens then is that the white gets muddy looking, especially if a person tries to work it in with other colors.
When the drawing is finally finished, I use my chop (this is a stone with a mark carved into the bottom of it) from when I lived in China, and then also put my signature on it. With this drawing, the chop actually showed up better when I erased some of the charcoal areas - when I decided that I hated the drawing. In the almost final drawing, I did stamp the chop onto the drawing, but it did not show up too well. In a future post, I can show some photos of my chop (I did get several), but one is special as it was done by an artist who was very good at it. He went to school to learn calligraphy and was excellent.
Hope this process was interesting...
MaryAnn


My baby's beautiful toes!! I love this post--it's really cool to see all the work that is involved in your drawings. Can't wait to read more like this!! Julie
ReplyDeleteThank you!
ReplyDelete